Showing posts with label recipe. Show all posts

Thursday, November 4, 2010

Mission: Perfect Cake, Part 4 Chocolate Cookies 'n Cream Marathon Cake


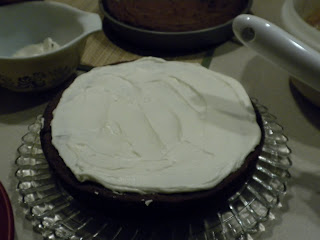
At the end of September my brother ran the Akron Marathon. This was his second marathon, he ran the Cleveland Marathon in the spring, well, I'm not sure there is any better food to splurge on after running 26.2 miles in about 3 and a half hours than cake. This was my third attempt at a chocolate cake and it is definitely improving. I think I'm starting to get a little bit of a grasp of what each ingredient of the cake actually does to the cake, and why they are needed. Once again it might not be perfect yet, but I know I'm headed in the right direction. This cake held together a lot better than the last two chocolate cakes, the texture is getting closer to how I like a cake to be. This time around I used milk chocolate as well as bittersweet in even proportions, and I think I like it more than just milk chocolate. It makes the chocolate flavor of the cake stronger, and hold up more to all the icing. Other changes I made were adding another egg, a little more flour and heavy cream, and a little bit more baking powder. Next time around I think I will try adding even more baking powder, swap the heavy cream for buttermilk and add a little bit of oil to hopefully moisten it up even more. Just because the recipe isn't perfect yet doesn't mean I don't recommend giving it a try yourself, it is still a really good, and it's never a bad thing to have a fresh homemade cake around.


Chocolate Cake Part 3
2-8" rounds
1 stick of butter, room temperature
2 1/8 c flour
3 eggs
1/2 c granulated sugar
1/2 c brown sugar
1 1/2 tsp vanilla
1 tsp baking powder
1/2 tsp baking soda
1 c heavy cream
8 oz bitter sweet chocolate
8 oz milk chocolate


Preheat oven to 350 degrees.

Place a bowl over top a pot with boiling water and melt the chocolate and butter together. When it is fully melted set aside and allow to cool.

As the chocolate and butter is cooling mix together the flour, baking soda and baking powder.

In a separate bowl cream the butter and sugars together, until the color lightens and it gets a fluffiness to it. Then whisk in the eggs and vanilla.

When the chocolate is cool mix it in with the creamed sugar and butter and egg mixture, and whisk well to fully incorporate. Then add the heavy cream to this, and again whisk well to combine.

Finally add the dry mixture to the wet mixture and stir well to fully incorporate them together, but be sure not to over mix it, a few lumps never hurt anyone.

Bake at 350 for 30-35 minutes or until a toothpick inserted in the center comes out clean.


Eat well, Live well

Sunday, October 24, 2010

French Onion Soup

I couldn't imagine living somewhere that didn't have fall. I really grew a real disdain for the heat of summer this year, I mean I really don't understand how people can like it when you are constantly either sweating or on the verge of breaking sweat. I think I never really appreciated how much I don't like the heat of summer because I always worked as a landscaper in the summer. Since I was always doing awful manual labor through the heat of summer, it was hot and sweaty to me no matter what. This was the first summer in like four or five years that I didn't landscape, and by the end I barely even wanted to go outside because I was so over the heat. Fall is the best because to me, there is nothing better than a day in the mid 50's with gray clouds, toss on a cardigan or nice fall jacket, watch football all day, or take in how great the scenery is with the changing colors of the leaves. Then of course the flavors and foods we get to start eating again. With fall it means it's time to bust out the soups, stews and chili recipes. We had a string of cool days recently so it put me in the mood for a soup. This was really my first attempt at a soup so I figured I'd give myself what I thought would be an easy one to start off with, french onion. I caramelize onions for meals I eat almost every day, and since that is almost all french onion soup is, this was a pretty easy one to make up. Of course, I didn't make my own stock or anything that involved, but does any home cook actually do that besides Ina Garten? If it's cool and crisp where you are and your in the mood for an easy soup recipe, give this one a try and I can't imagine you'd be disappointed.
*For the garlic croutons I just thickly sliced up a loaf of fresh bread, cut a piece of garlic in half and rubbed each side of the slices of bread. Then I drizzled them with a littleolive oil and sprinkled them with salt and pepper, parsley, oregano, basil and parmesan cheese. I baked them for 10-15 minutes at 400 degrees to crisp them up. Then I placed them on top of my bowl of soup, blanketed it with some swiss cheese and baked it again until the cheese was melty. (Then I enjoyed)


French Onion Soup

5-6 medium sweet onions, sliced thin
2-3 slices of thick cut bacon, cut into lardons
1 quart box of veal stock (I would imagine beef or vegetable could also be used)
3 c water, plus more for caramelizing the onions
1/2 c red wine
2 tbsp sherry
2 tbsp granulated sugar
salt and pepper


Bring a large pot up to medium high heat, add a a few drops of olive oil and crisp up the bacon. When the bacon is done take it out of the pot and add the sliced onions. (Don't drain the fat the bacon leaves behind, use it to caramelize the onions, to not only give the soup a richer flavor, but also make it healthier since you the only fat used in this soup is from the bacon.)

After the bacon is finished cooking, add the onions and sugar into the pot, and season them with some salt and pepper. Stir only every once in a while so they have a chance to really get good and caramelized. After about a 45 minutes to an hour of them caramelizing in only the bacon grease (and stirring them only a couple times), add about 1/2-3/4 of a cup of water at a time and let the onions cook until the fluid is evaporated. Do this at least 2-3 times and it while caramelize the onions further, without risk of burning them.


After you're happy with how caramelized the onions are add the stock, water, sherry and red wine to the pot. Bring to a boil then reduce to a simmer and cook for another 1-2 hours stirring occasionally. Give it a few tastes every once in a while to check seasoning.

To serve make the garlic croutons as stated above, place on top of the soup cover with a layer of swiss, or similar cheese, and bake in an oven at 425 degrees until the cheese is melty and starting to brown.


Eat well, Live well

Wednesday, October 13, 2010

Caramelized Onion and Mushroom Ravioli


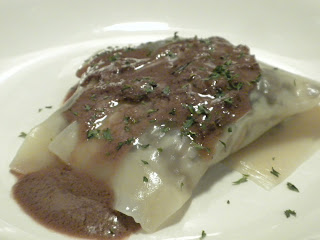
I eat spaghetti at least three times a week. I cook a huge pot of sauce about once a month and freeze it in daily portions, which I use about two times a week. My mom also usually makes a fresh pot once a week. Mondays, Thursdays and Sundays are spaghetti days. The thing about it is I can eat spaghetti every day, easily, and I probably wouldn't mind it more than once a day either. I love spaghetti. A lot of weeks however, three times just isn't enough, and more spaghetti days are added. They don't always have to be with red sauce, and this was one of those days. I love ravioli, but I don't feel like I eat enough. I've been thinking about this combination inside a ravioli for a while, and finally gave it a try. It actually turned out really well, especially with the sauce I used for it, but now that I think about it, I'm sure it would be just as good with my standard red sauce as well. Since I don't have the time during the week to whip up my own pasta dough (though it would be nice), I used store bought wonton wrappers for the ravioli, and while they worked just fine and tasted good, they were definitely the weakest part. The main problem I think with them is they are too thin. When I eat ravioli I like it to be kind of doughy. All in all though, this was a recipe I was excited to eat, it ended up tasting great, and using the wonton wrappers actually makes it quite fast and easy to prepare as well. I thought it was one of the better meals I've made in a while, give it a try yourself, and if you do let me know what you think.


Caramelized Onion and Mushroom Ravioli
20-25 raviolis
1 package of wonton wrappers (oddly found in the produce section of a grocery store, near the baby carrots and things like that, I had to ask someone where they were to find them)

Filling:
1 package of assorted mushrooms, diced; I used a mix of cremini, shitake and oyster mushrooms, and I'm pretty sure it was like 5 oz.
1 medium red onion, diced
1 tbsp olive oil
1 tbsp butter
salt and pepper

Sauce:
2 shallots, slice thin
1/2 c red wine
1 tbsp dijon mustard
2 tbsp sour cream
1 c beef stock
1 tbsp olive oil
salt and pepper


On medium heat saute the dice onions until they begin to brown and caramelized, at least 30 minutes.

When the onions begin to brown and caramelize, add the mushrooms and saute until they soften and brown up as well, about another 10 minutes.


When both the onions and mushrooms are done cooking, set aside and allow to cool.

Fill a pot up with water and bring it to a boil.

As the water is coming up to a boil prepare your ravioli, and make the sauce.

Using one wrapper place about a teaspoon of the mushroom/onion mixture in the center of the wonton wrap.


Dip a finger into a cup of water and spread it around the edge of the wrapper. Then fold the wrapper over the feeling, press down the edges and make sure the ravioli is sealed completely.


Repeat this process until all of the filling is used up and you made all of your raviolis.


For the sauce, in a bowl combine the dijon, sour cream and beef stock and mix to combine.

Meanwhile over medium heat add about a tablespoon of olive oil to a frying pan crisp up and caramelize the shallots . After about 5-10 minutes the shallots should be caramelized, add the red wine to the pan and allow to reduce until it is almost fully evaporated, another 5-10 minutes.

Finally stir in the sauce mixture that you combined in a bowl, and reduce until it starts to thicken up and isn't so watery, stirring every so often, about another 5-10 minutes.

When you start to reduce the sauce add the ravioli to the boiling water. They should only take about 2-3 minutes, and you'll know they're done when they start floating to the top. Drain and top with the sauce, enjoy.


Eat well, Live well

Thursday, October 7, 2010

Mission: Perfect Cake, Part 3 Chocolate 'Smores Cake


Man, another busy week of school, what a drag. This time it was a 25 minute patient case presentation on Monday, lead a class discussion about one of the landmark diabetes clinical journal articles Wednesday, a quiz today, and the worst part is next week is shaping up to be even worse. Eight months from now couldn't come quick enough (when I'm finally done with all classroom learning forever). Anyway even if I don't find time to write about it, I always do make time to cook, or bake, whatever the case may be.
This time around, in my mission to make the perfect cake, I made some edits to my chocolate cake recipe, and the results were much better. This time the chocolate cake was a 'smores cake. I got the idea for the 'smores part of the cake when I saw this recipe for smores semifreddo, on Food52. Who knew that you can broil marshmallow fluff and it turns into a toasted marshmallow, a better idea may have never been thought up. Once I saw that toasted fluff I knew I needed to try it so I figured why not use the toasted marshmallow fluff as my middle layer of frosting, instead of my normal buttercream. Then I lined the top and bottom of the middle layer with a very thin layer of vanilla buttercream. On the outside I made a chocolate buttercream and crushed up graham crackers and sprinkled those over the entire outside, as well. A better 'smore has never been created. Even though the cake part of this isn't perfect yet, everything else combined to make something absolutely unbelievable. I've never had anything like this before, and can't wait to do it again, everyone who had some couldn't believe how good it was either(which helps to prove my early cake theory about how the frosting makes the cake and not the cake itself), this is a must try. If you still aren't confident in my cake recipe yet, use a boxed cake, or your own recipe, but definitely make it a 'smores cake.
Now to the problem list (after I tell you to make this cake I list problems with it, real convincing I know). I think the chocolate flavor isn't as strong as I want it. I think it might be because I only use milk chocolate, so next time I think I will go with a half and half mixture of milk and semi-sweet chocolates. The cake also fell in again. I'm not really sure how to fix this problem, but I will try to figure it out, so I guess other than that I think it will just be tweaking the measurements of the flour, baking soda and baking powder to get it to the right density and fluffiness, which hopefully might in turn have something to do with the cake falling in.


Chocolate 'Smores Cake
2 8" rounds
1 stick of butter, softened
2 cups flour
2 eggs
1/2 c brown sugar
1/2 cup granulated sugar
1 tsp vanilla
1/2 tsp baking powder
1/2 tsp baking soda
3/4 c heavy cream
12 oz. milk chocolate
1 tub of marshmallow fluff, for the toasted marshmallow middle layer


Preheat oven to 350 degrees.

Place a bowl over top a pot with boiling water and melt the chocolate and butter together. When it is fully melted set aside and allow to cool.

As the chocolate and butter is cooling mix together the flour, baking soda and baking powder.

In a separate bowl cream the butter and sugars together, until the color lightens and it gets a fluffiness to it. Then whisk in the eggs and vanilla.

When the chocolate is cool mix it in with the creamed sugar and butter and egg mixture, and whisk well to fully incorporate. Then add the heavy cream to this, and again whisk well to combine.

Finally add the dry mixture to the wet mixture and stir well to fully incorporate them together, but be sure not to over mix it, a few lumps never hurt anyone.

Bake at 350 for 35-40 minutes or until a toothpick inserted in the center comes out clean.


For the Toasted Marshmallow Fluff:


Preheat the broiler to high.

Simply put parchment paper down on a baking tray and wipe with a stick of butter.

Spread the fluff in an even layer on the baking tray. After about a minute (maybe sooner, it will burn fast so keep a sharp eye on it) or so the fluff should all be toasted on the top. With a spatula stir the fluff around so the toasted layer is incorporated into the rest of the fluff.

Broil the fluff again to get another layer of toasted marshmallow, allow to cool a little bit and enjoy. Use for the cake, or anything else you could imagine, this stuff is crazy good (you'll never need a campfire again).


Eat well, Live well